
What PDF mapping is
Mapping is the operation that turns a static PDF (e.g. an already-formatted sales contract) into a dynamic template: on top of the PDF you place "active zones" (fields) that at send time are automatically filled with customer data and collect the electronic signature.
Done once, mapping saves you hours every week: you generate a filled contract in seconds, send it for signature and receive the signed PDF archived under the right customer.
Before you start
- A vector PDF (not a scan). If your contract is a photo or a scan, export it first from Word / Google Docs as a PDF.
- You already know which data you want to collect (customer name, VAT, amount, date, signature…). Just have it in mind.
- A YouKont account on a plan that includes custom templates.
Create a new template and upload your PDF
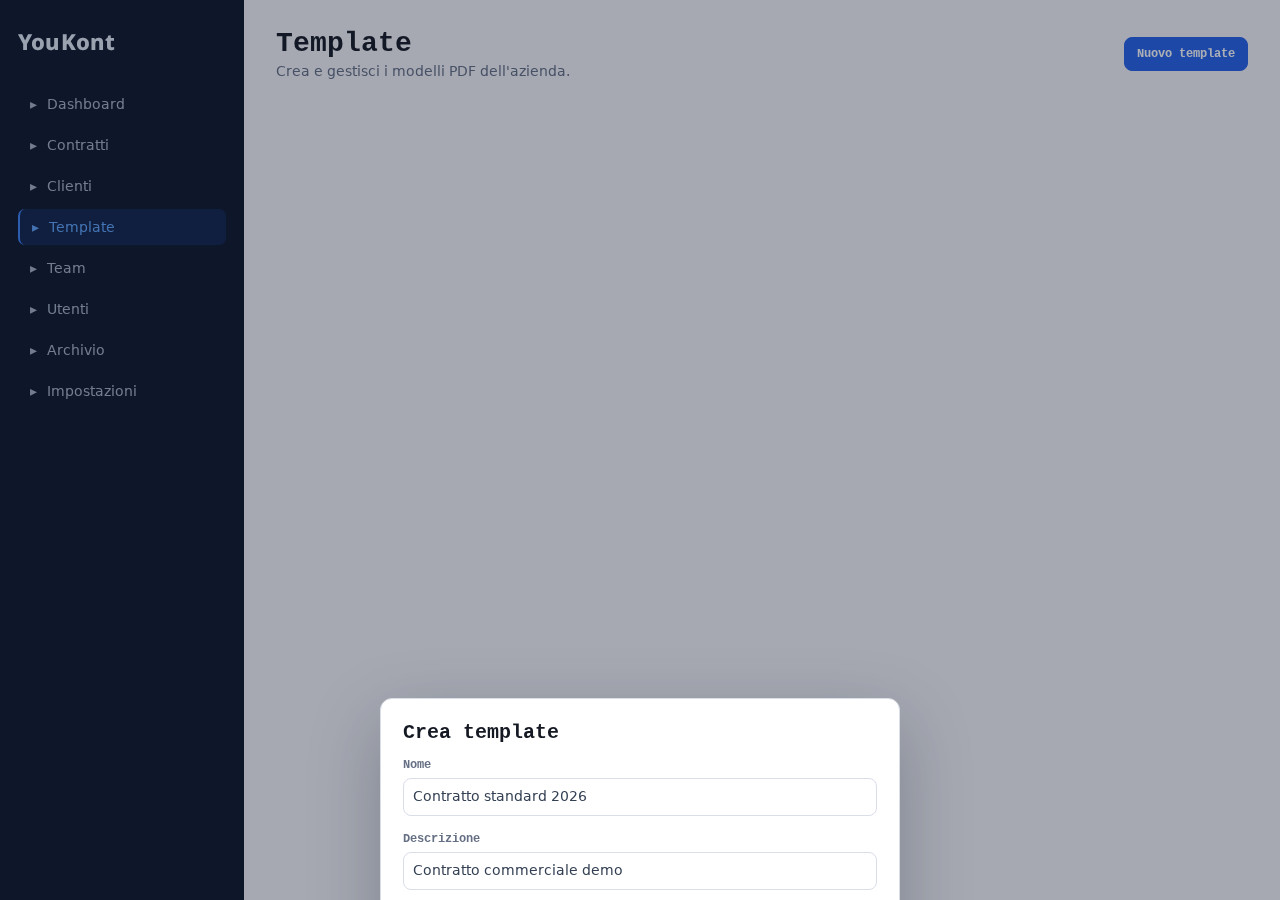
From the side menu open Templates → New template. Give it a clear name (e.g. "Standard contract 2026") and upload your source PDF.
YouKont converts the PDF into scrollable pages and opens the visual editor immediately.
The template name is what you'll see when generating a contract. Use clear names like "Services quote" or "Vendor NDA".
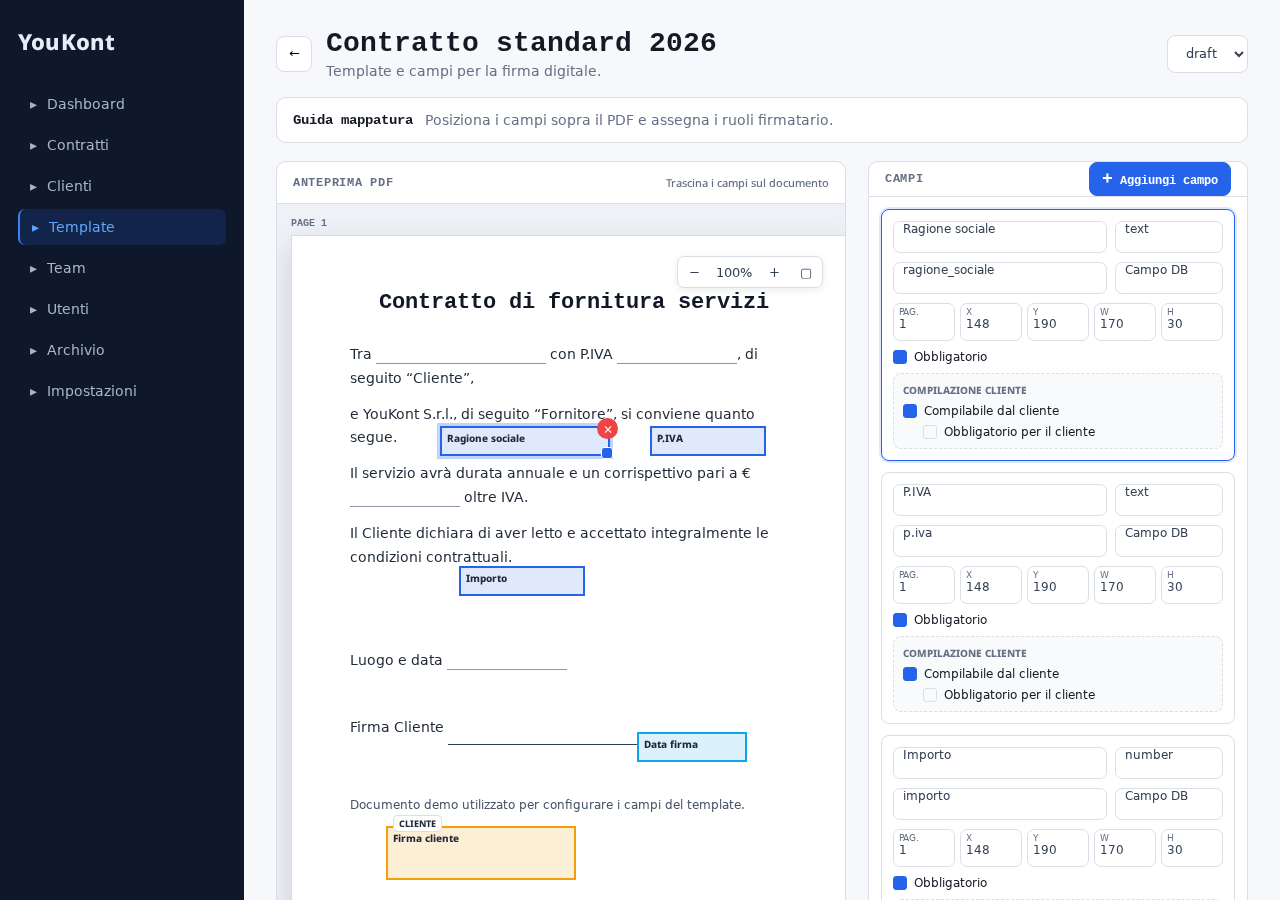
Editor overview
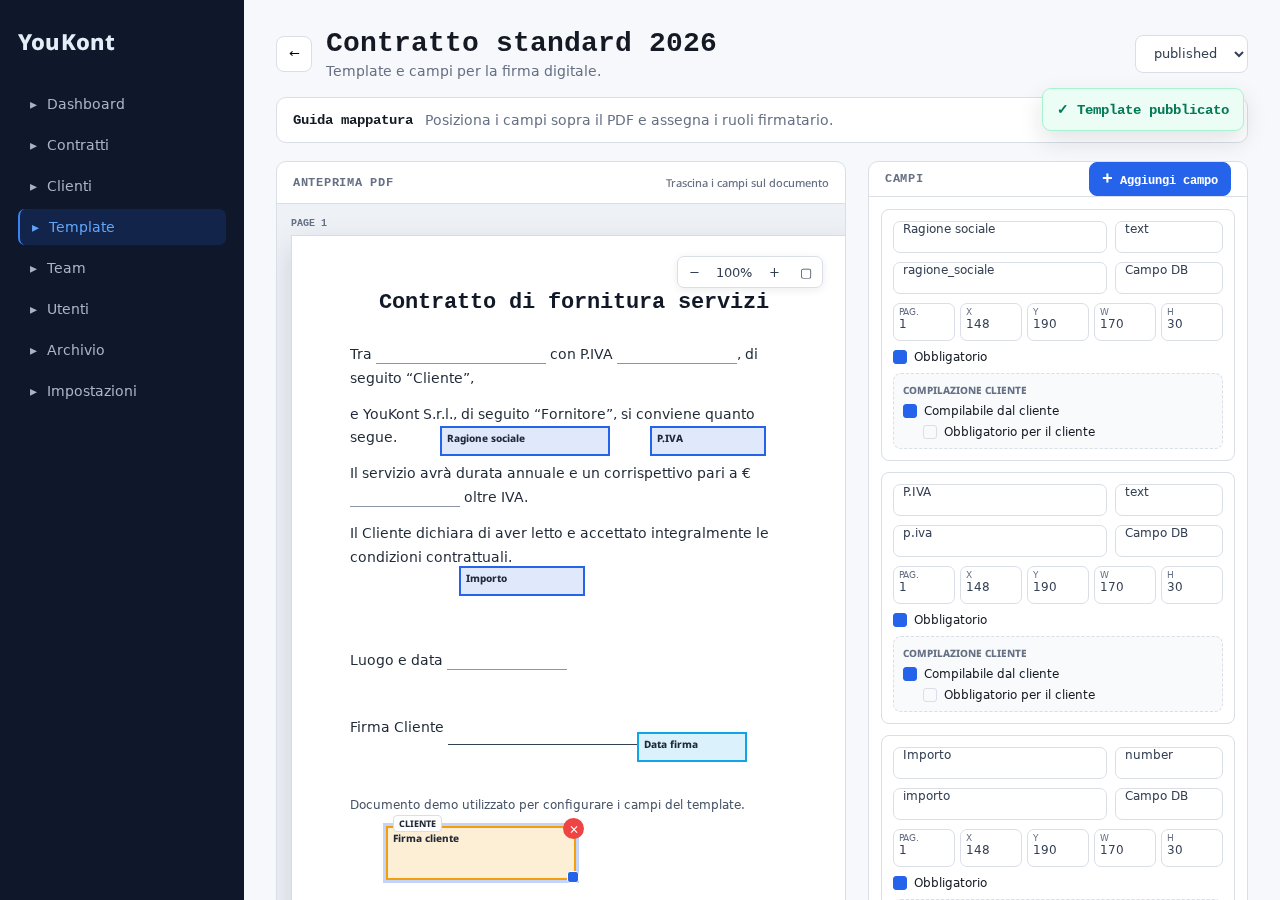
The editor is split into three areas: the PDF at the center with pages stacked vertically, the available-fields panel on the right, and the top toolbar with zoom, current page, preview and Publish button.
Zoom with Ctrl+scroll (or pinch on a trackpad) to place fields with pixel-level precision.
Add your first field from the right panel
In the right panel pick a field type: Text, Number, Date, Email, Phone, Checkbox, Dropdown (Select) or Signature. Clicking a type adds the field onto the PDF on the current page.
Fields can be pre-filled by you at contract generation time, or left for the recipient to fill in before signing by enabling "Recipient-fillable" in the properties panel.
The file must be an actual PDF (not a scan saved as an image) and stay within the upload size limit. If it doesn't load, re-export it from Word / Google Docs as a PDF.
Drag the field into the right place
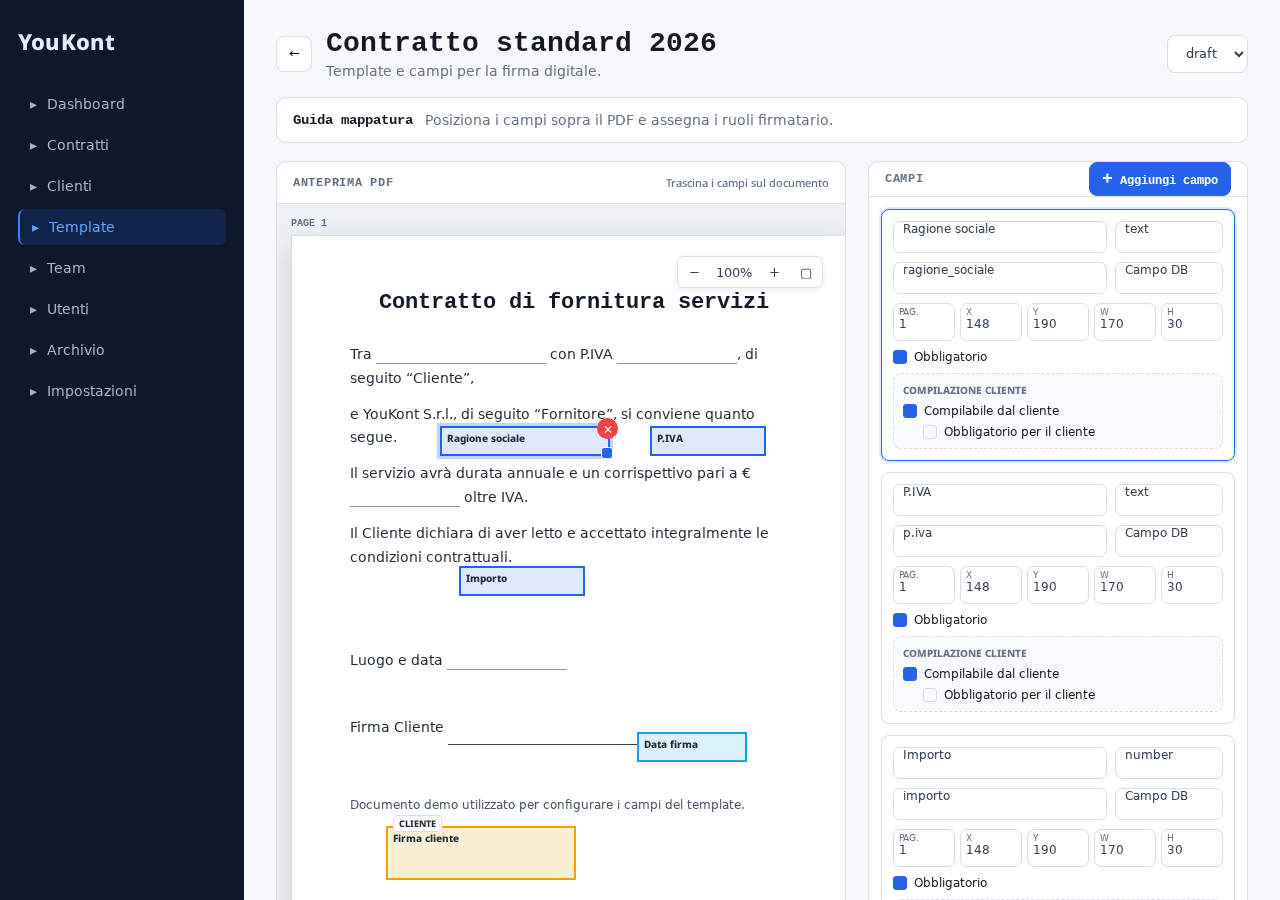
Grab the field you just added and drag it over the row in the PDF where it should appear (e.g. after "The undersigned…"). The field moves freely on the canvas — drop it in the desired position.
If a field ends up behind another one and you can't select it, move the top field aside first or delete it temporarily to reach the one underneath.
Field properties in the right panel
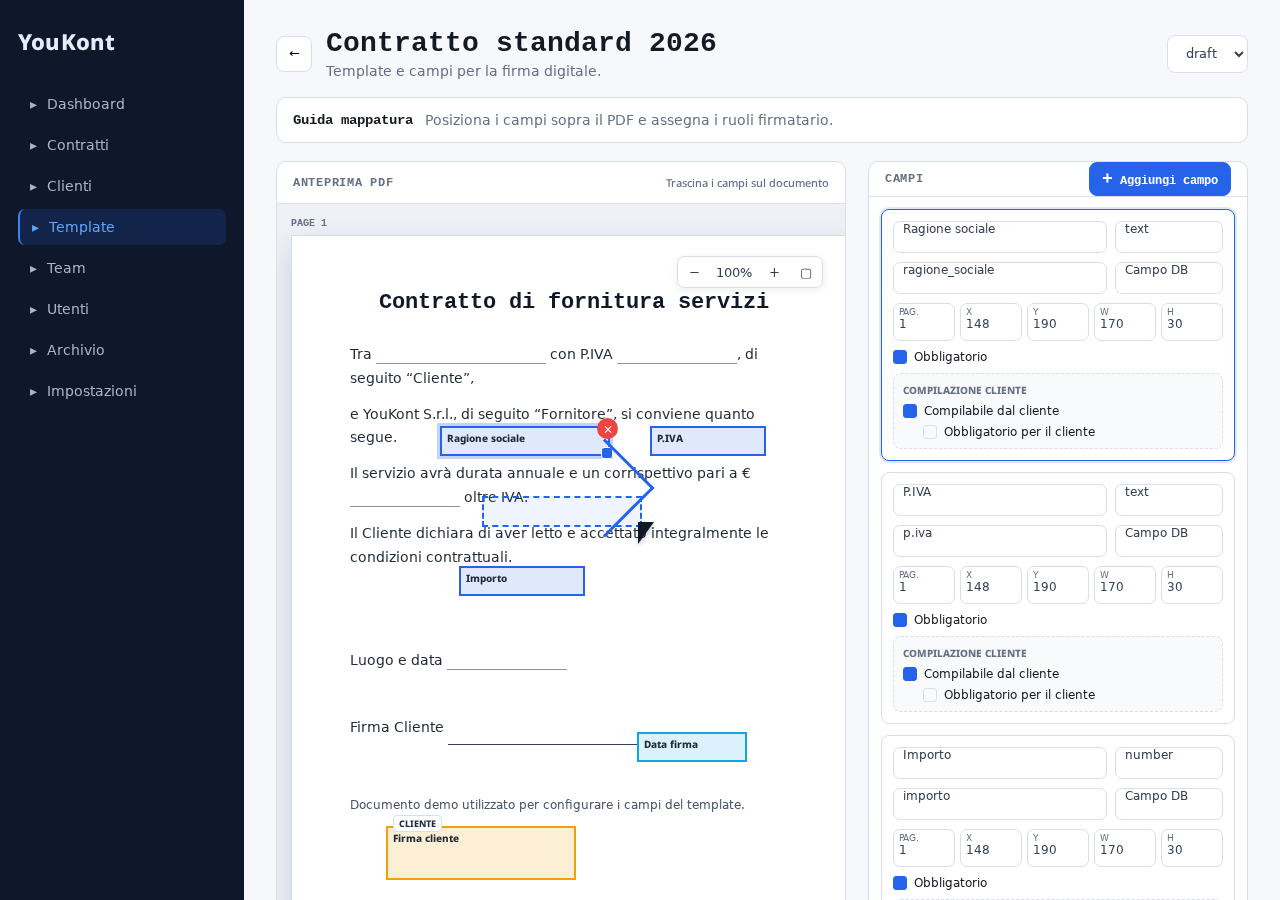
When you select a field, the properties panel opens on the right: you can change its type, set the label, mark it as required and — for Select fields — define the dropdown options.
For Signature fields you can assign a signer role (a free-text label such as "Customer", "Seller", "Witness"): all signatures sharing the same role are collected from the same signer.
You can duplicate an already-configured field from the properties panel: handy for creating multiple similar rows or several signature boxes with the same role.
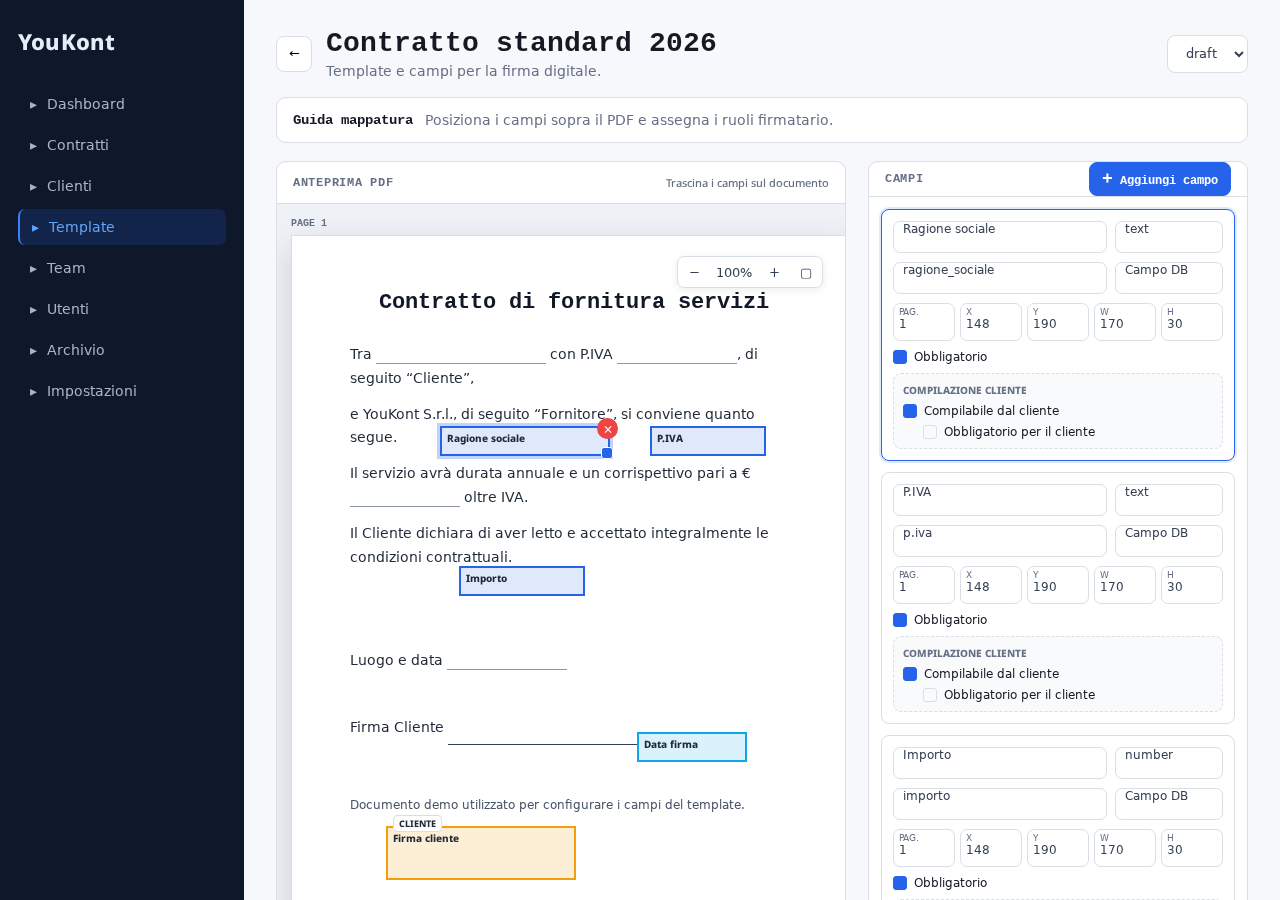
Add the Signature field
From the right panel add a Signature field and place it over the signature line in the PDF. Resize it to cover the area where the signature will be drawn.
The Signature field is always filled by the recipient from the signing link, drawing on a canvas with finger or mouse. If you need a second signer (e.g. a seller or a witness), assign a different signer role to that field — see the next step.
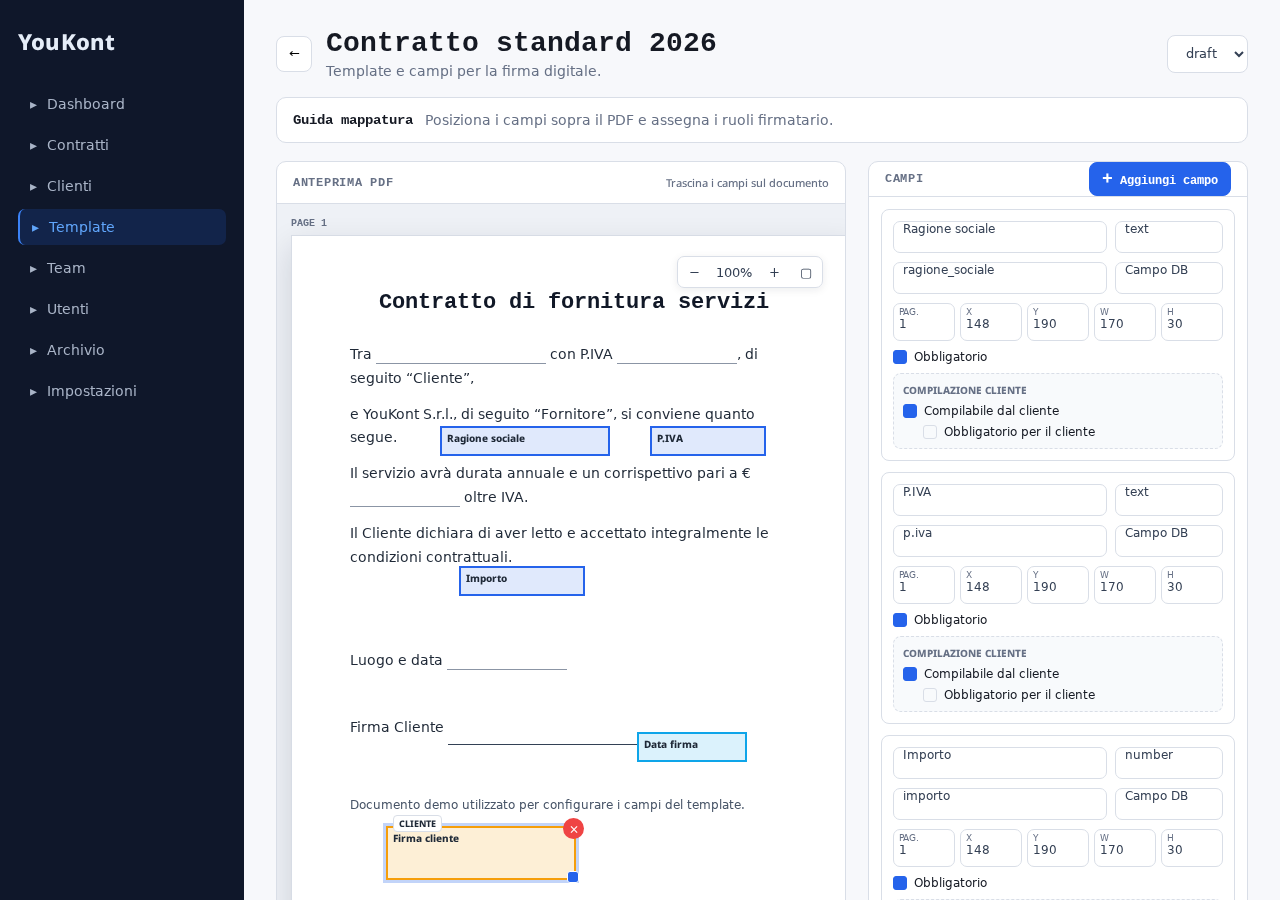
Signer roles and multi-signature
If more than one person has to sign (e.g. customer + witness, or two contracting parties), assign each Signature field a different signer role from the properties panel.
At send time, YouKont asks for one email per distinct role: each signer gets their own personal link and only fills the fields assigned to their role.
Non-signature fields (Text, Date, Checkbox…) can also be made recipient-fillable, marked as required, and locked after they're filled — so the signer can't change them anymore before signing.
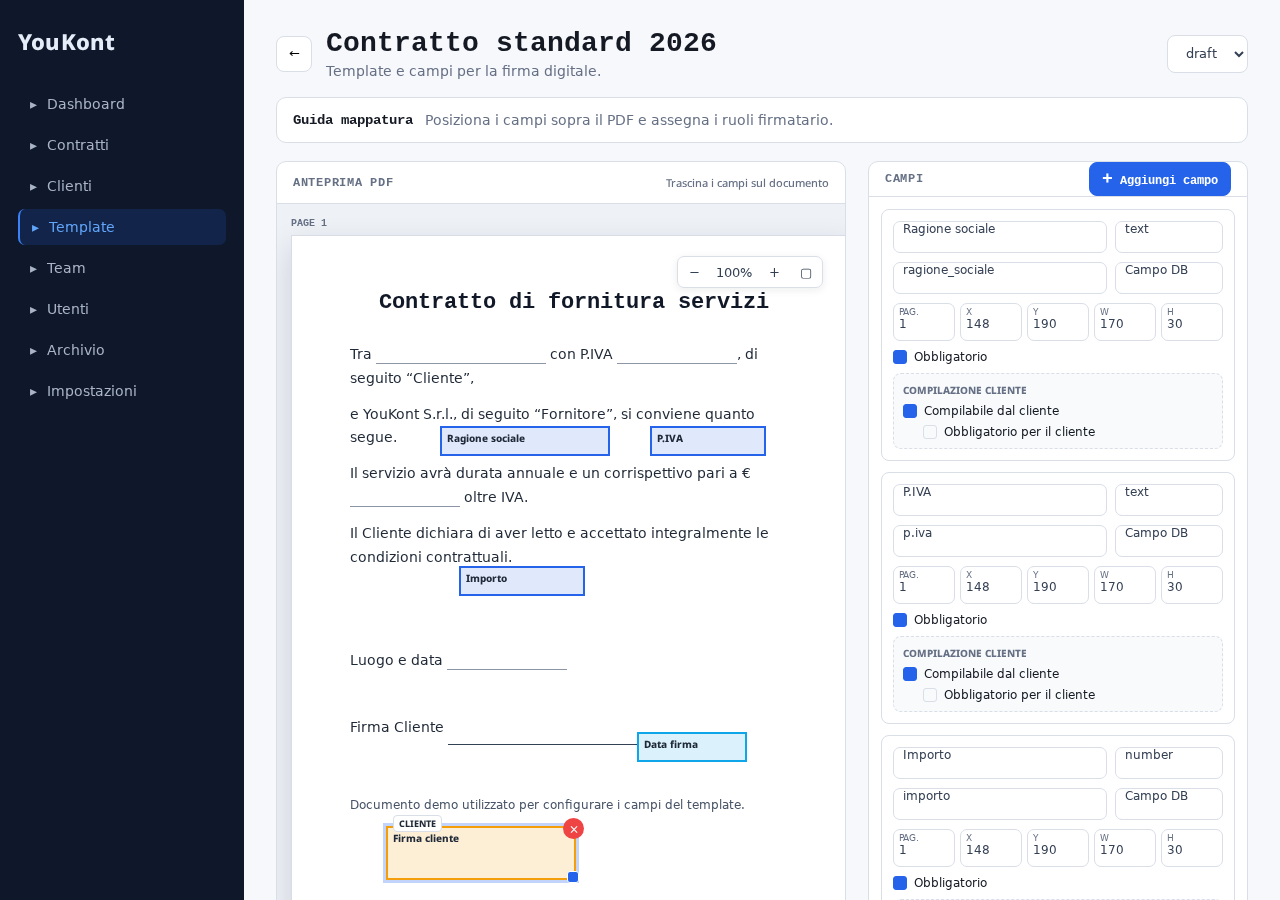
Preview with test data
Click Preview at the top to see the template filled with sample data. This is when you check that every field is in the right place and doesn't overlap with the PDF text.
If something is off, close the preview, move the field and try again. Nothing is committed until you Publish.
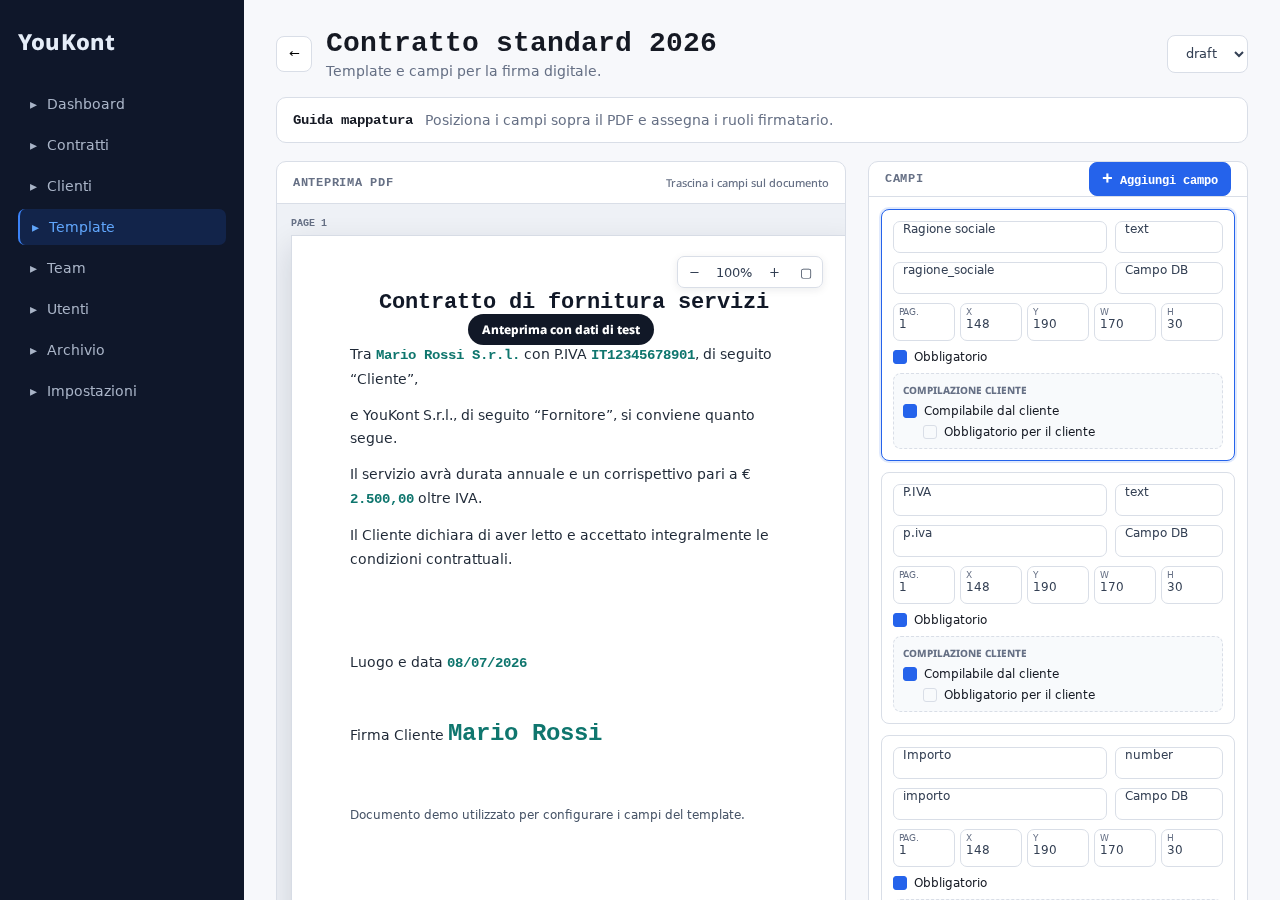
Publish the template
When you're happy with the result, click Publish in the top right. The template becomes available to your whole team to generate new contracts.
You can go back to draft mode at any time to edit it: contracts already sent are untouched — only those generated after that point use the new version.
Generate a contract and send it for signature
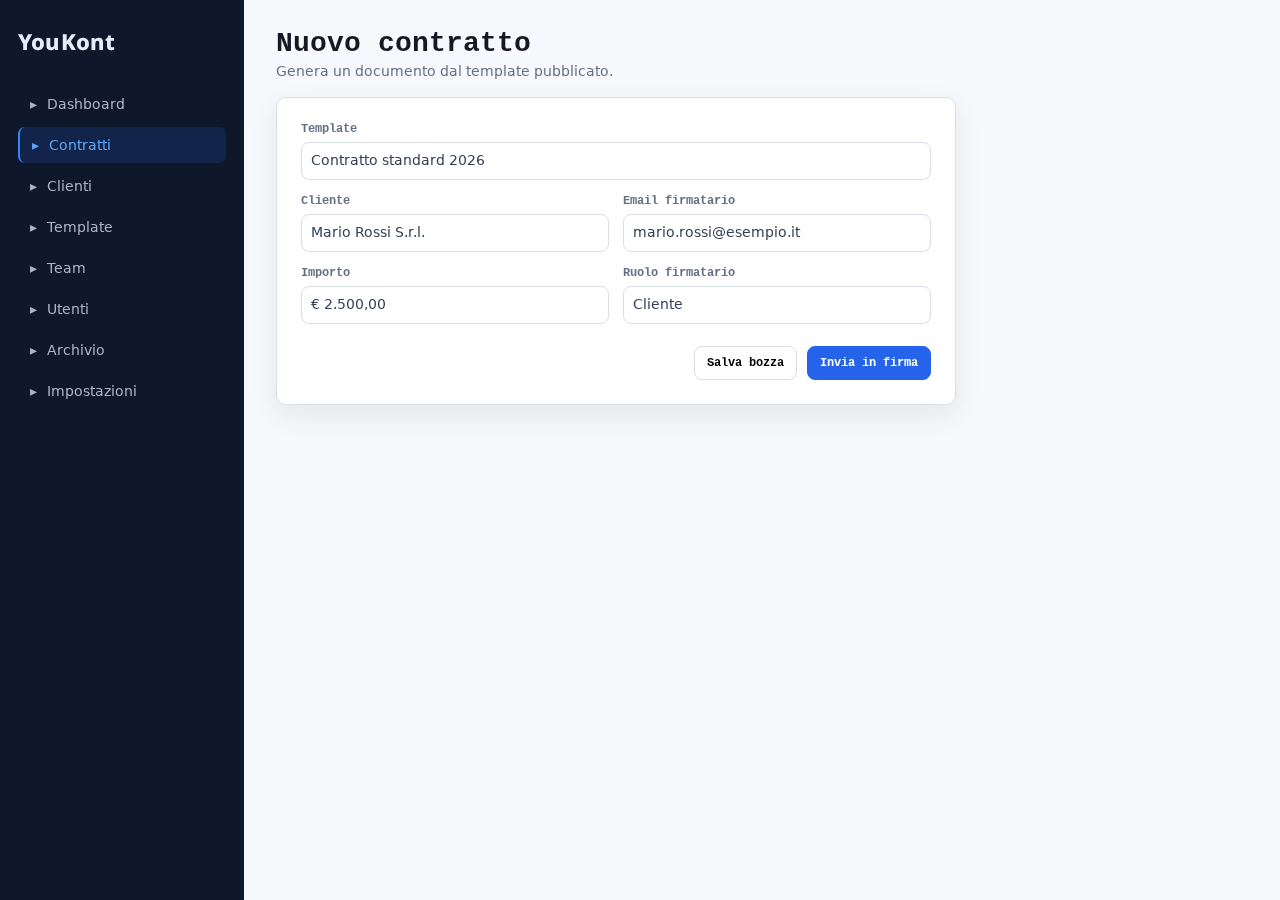
Go to Contracts → New contract, pick the template you just published and select the customer. YouKont automatically fills every mapped "customer" field.
Click Send for signature, enter the signer's email and confirm. The recipient receives a personal link, opens the PDF, signs with finger or mouse, and you get a notification as soon as the contract is signed.
Best practices
Always start from a vector PDF
PDFs exported from Word, Google Docs or InDesign have selectable text: the editor respects it and signatures land in the right spot. Scans are flat images and positioning takes much more work.
One template per contract variant
Three clear templates (Standard, Premium, NDA) beat a single one with 40 conditional fields. It's faster to maintain and less error-prone.
Use customer fields wherever you can
Every field mapped to the customer database avoids a typo. Name, VAT, address, city: map them once and they're ready forever.
Test with a real customer before publishing
Generate a test contract with a real customer's data and open the final PDF. It's the best way to spot a misalignment before actually sending it.
Common issues
The field won't drag or can't be selected
Make sure the field is selected (highlighted border). If a field is stacked under another one, move or temporarily delete the top field to reach the one underneath.
The signature appears out of place in the final PDF
Usually the Signature field is too small or too wide relative to the PDF signature line. Open it, resize it to cover the whole signature line and re-publish.
The PDF won't upload
Check the file is a real .pdf (not an image renamed with .pdf) and stays within the upload size limit. If needed, re-export it from Word / Google Docs as a vector PDF.
The recipient can't see a field they should fill
Recipient-fillable fields are shown only for the signer role they are assigned to. Verify the field has "Recipient-fillable" enabled and that its signer role matches the one you sent the link to.
Frequently asked questions
How long does it take to map a contract?
A standard 2-4 page contract takes 5 to 15 minutes the first time. The next ones are even faster because you can duplicate an existing template and just change the fields.
Can I map multi-page PDFs?
Yes, the editor supports PDFs of any length. Pages scroll vertically and you can place fields on any page.
What happens to already signed contracts if I update the template?
Nothing: signed contracts are immutable and stored with their original PDF. Only contracts generated after publishing the new version will use the updated template.
Can I request multiple signatures on the same PDF?
Yes. Add multiple Signature fields and assign each a different signer role (e.g. "Customer", "Seller", "Witness"). At send time enter one email per role: every signer receives their own personal link.
Are the collected signatures legally valid?
Yes. YouKont applies a Simple Electronic Signature (SES) compliant with the eIDAS regulation, with an audit trail (IP, timestamp, device) attached to the signed PDF.
Can I let the recipient fill in some fields before signing?
Yes. Any field (Text, Number, Date, Email, Phone, Checkbox, Select) can be marked as "Recipient-fillable", made required, and locked once filled so it can't be changed anymore before signing.
Can I edit a template after publishing?
Yes, any time. Changes only apply to contracts generated after saving: the history of already-sent contracts stays intact.
Ready to map your first PDF?
Try YouKont free — no credit card required. In 5 minutes you'll have your first template published and ready to send for signature.